Setting the price for the products you sell in your store is crucial for ensuring profitability. Your selling price must always exceed the cost charged by your supplier. At Zopi, you can leverage the Pricing Rules feature to automate your product pricing effectively. Follow the steps below to set it up quickly and efficiently.
Set Pricing Rules
To establish pricing rules for your products, follow these instructions. The rules will take effect once saved, allowing for streamlined pricing management.
Steps to Set Up Pricing Rules
- Log in to Zopi > Settings & Billing > Selling Price.
- Select your desired pricing rule type by clicking the corresponding radio button.
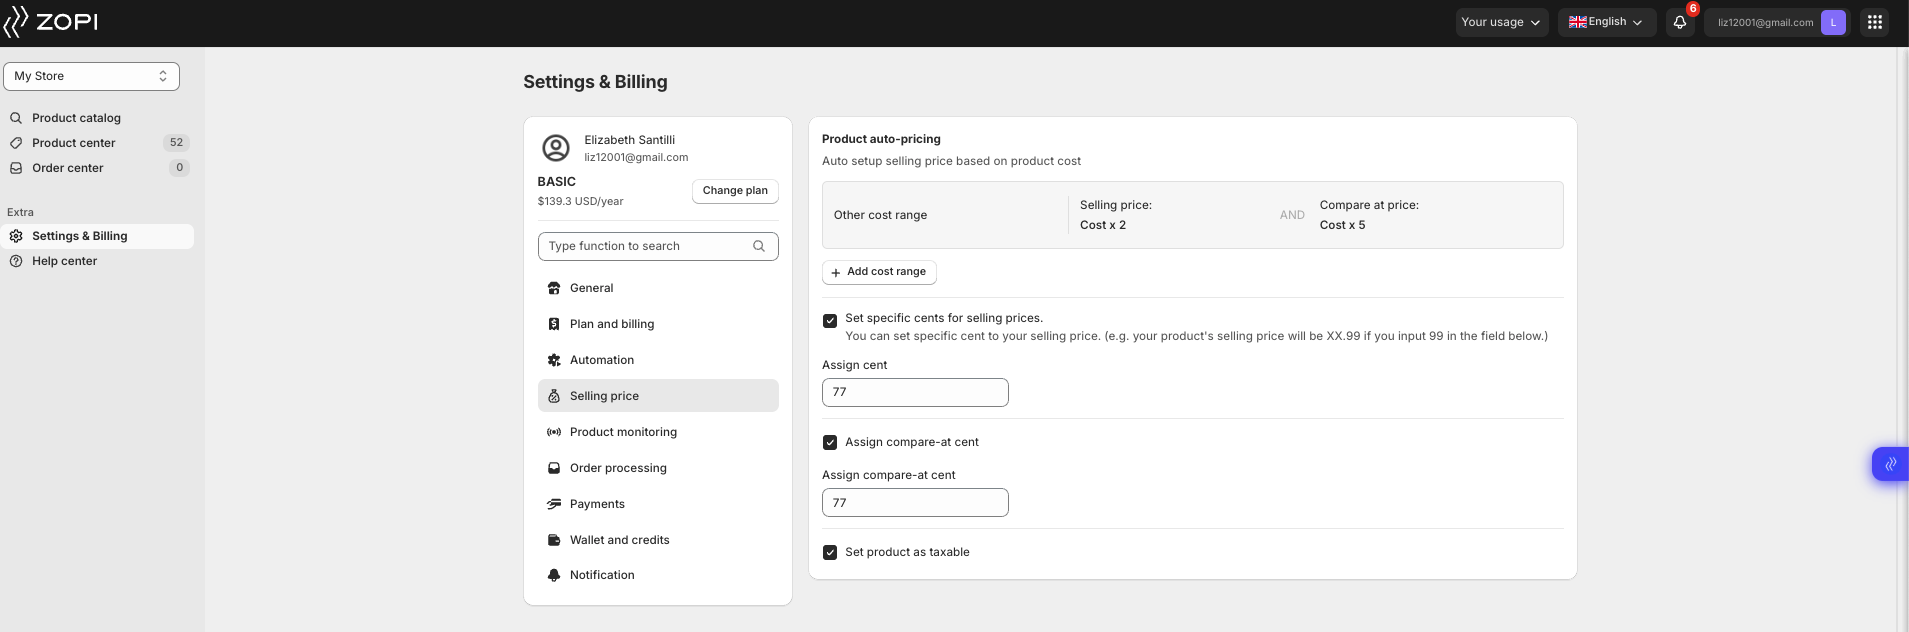
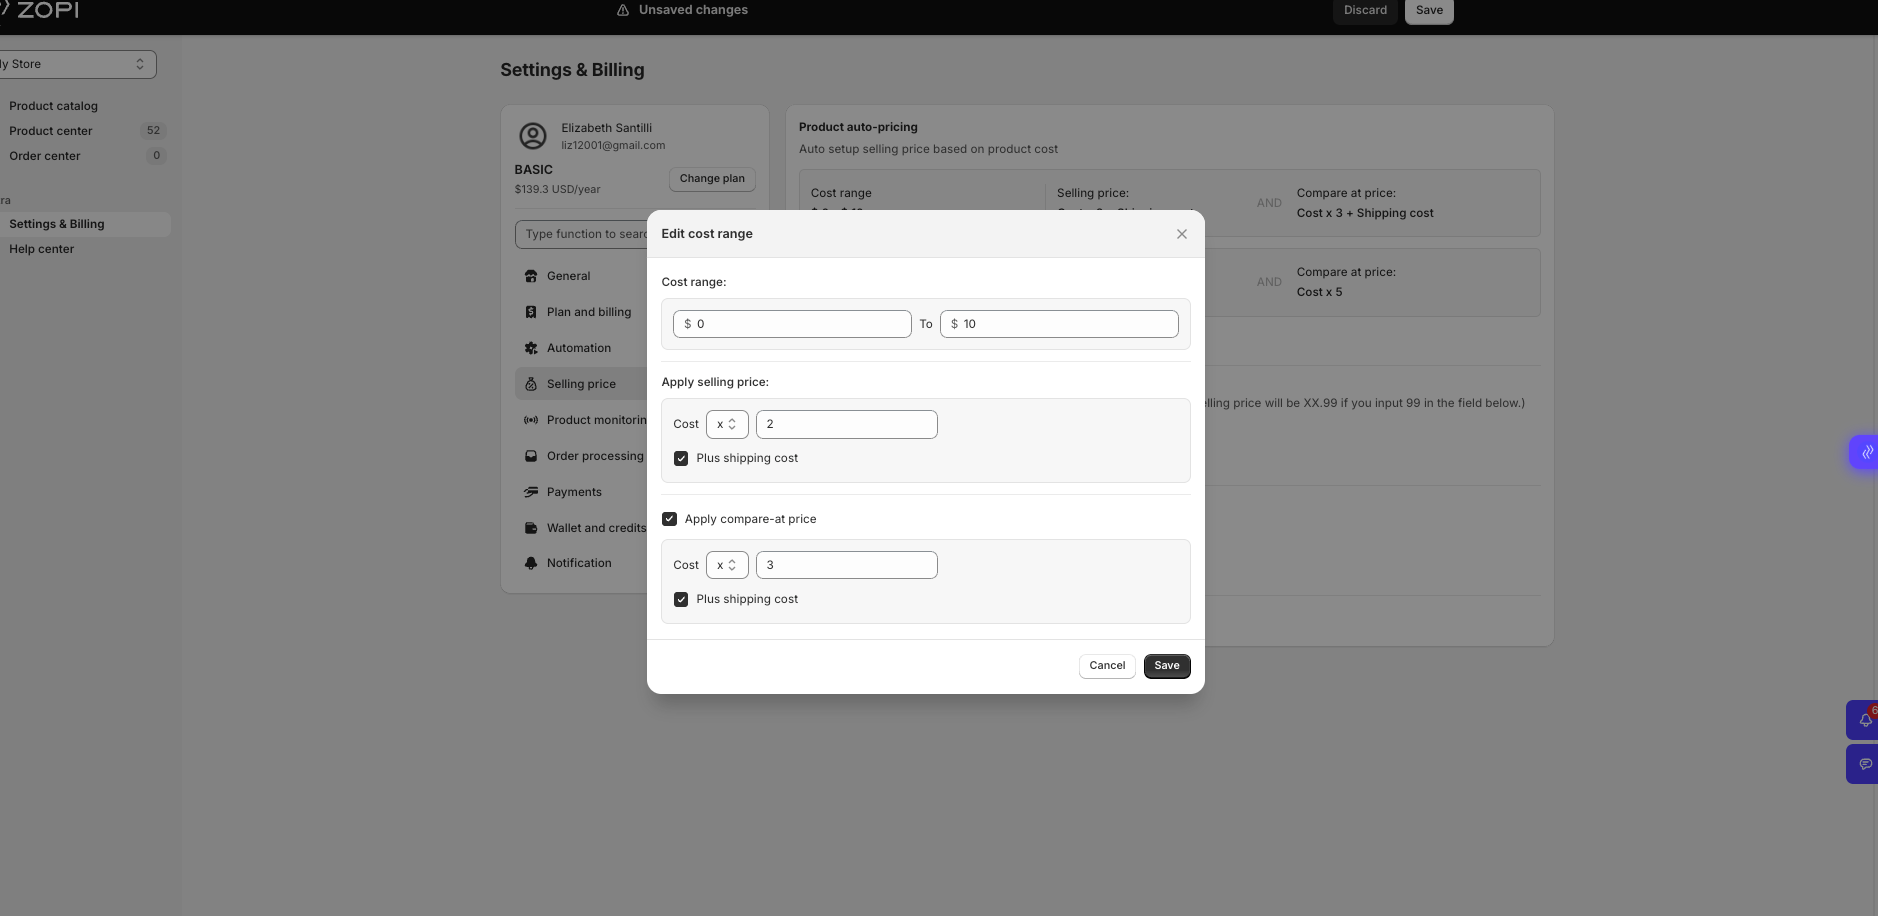
- Cost Range: Set a cost range to determine new product prices. This is particularly useful for a diverse product range. You can add multiple cost ranges using the “Add Cost Range” button.
- Selling Price: The price displayed on your storefront. You can use “Multiply” or “Plus” techniques to set product prices for desired profit.
- Multiply: Multiply the original product price by your chosen factor.
- Plus: Add a specific amount to the original product price.
- Compare at Price: This feature helps create artificial sales in your Shopify store. Set your desired “Multiply” or “Plus” to configure it. Disable this option if you don’t want to display the comparison price, but ensure that the “Compare At Price” is higher than the “Selling Price”.
Set Assign Cents
Zopi allows you to set a specific cent value for your prices, enhancing pricing precision.
For example, if a product costs $5.70 (on AliExpress) and you have set the Pricing Rules to multiply by 3, the calculated price will be $17.10. If you set the cents to 99, the product price will be 17.99 in your store.
Set Taxes for Products
You can designate products as taxable, ensuring compliance with tax regulations.
Enable this feature by checking the Set products as taxable box.
Note that the newly saved rules apply only to new imported products and do not affect products already in the Favorite List section or those pushed to your store.
How should i price the items I am selling?
Actually, a good rule of thumb is to mark up your products by at least three times their cost. You also set the Compare-at Price at 2.5 to 3 times the product cost to create an appealing discount for your customers
How to add Zopy in Shopify as the Corrier of choice? are the prices not based on weight of the object?
What then happens on the object that has more weight than the normal handling objects or is the pricing for dropship always the same?
Here’s how Zopi works with Shopify regarding shipping and pricing:
1. Zopi as a Courier in Shopify:
Zopi is not a shipping carrier or courier service itself. Instead, Zopi helps you import products from suppliers (like AliExpress or Temu) and automates order fulfillment. The actual shipping is handled by the supplier, not by Zopi. In Shopify, you cannot set Zopi as a courier; shipping options and rates are determined by the supplier and the shipping methods they offer.
2. Are Prices Based on Weight?
Yes, shipping prices from suppliers (like AliExpress or Temu) are often based on factors such as:
– Weight and size of the product
– Shipping origin and destination
– Shipping method chosen
When you check a product in Zopi, you can see the shipping cost by specifying the shipping origin, destination, and provider. This helps you understand the total cost before setting your selling price.
3. What Happens with Heavier Objects?
If a product is heavier or larger than usual, the supplier’s shipping cost will typically be higher. Zopi will show you the shipping cost for each product variant, so you can factor this into your pricing. The dropshipping price is not always the same—it varies based on the product, its weight, and the shipping method.
Best Practice:
Always check the supplier’s shipping cost for each product and variant in Zopi before listing it in your store. Adjust your selling price to cover product cost, shipping, and your desired profit margin.
If you need help checking shipping costs or setting up pricing rules, let me know!