If you’re running a Shopify dropshipping store, getting your products in front of the right customers is key, and that’s where Google Merchant Center comes in. By installing and connecting Google Merchant Center to your Shopify store, you can showcase your products in Google Shopping results, increasing visibility and driving more traffic to your store.
With Zopi, the all-in-one dropshipping automation platform, integrating Google Merchant Center becomes even easier. This guide will walk you through how to install and set up Google Merchant Center on Shopify, helping you promote products, optimize campaigns, and grow your business.
What is Google Merchant Center?
Google Merchant Center is a free platform provided by Google that allows e-commerce sellers—like you—to upload and manage product data so your items can appear across Google’s shopping-related services, such as Google Shopping, Google Search, YouTube, and Google Ads.
Whether you’re just starting out or scaling your dropshipping business, using Google Merchant Center through Zopi’s integration ensures your product data is always accurate, optimized, and visible where your customers are searching.
Why Use Google Merchant Center with Shopify?
Using Google Merchant Center gives you access to:
- Google Shopping ads
- Free product listings across Google surfaces
- Greater visibility for your product catalog
- Real-time inventory syncing with Shopify
- Enhanced targeting through Google Ads integration
For dropshippers, especially those using Zopi, this integration allows your imported products to reach a broader audience while staying synced automatically.
Step-by-Step: How to Install and Set Up Google Merchant Center on Shopify
Step 1: Create a Google Merchant Center Account
- Go to Google Merchant Center
- Click Get Started
- Fill in your business name, website URL (your Shopify store), and location
- Accept the terms and complete the setup
Step 2: Add Google Merchant Center channel on Zopi
To begin the setup:
- Go to your Shopify Admin Dashboard
- In the left menu, click Apps > Zopi Dropshipping
- Navigate to the Settings & Billing section > Select the Channel tab.
- Click the “Add Channel” button at the top right corner.
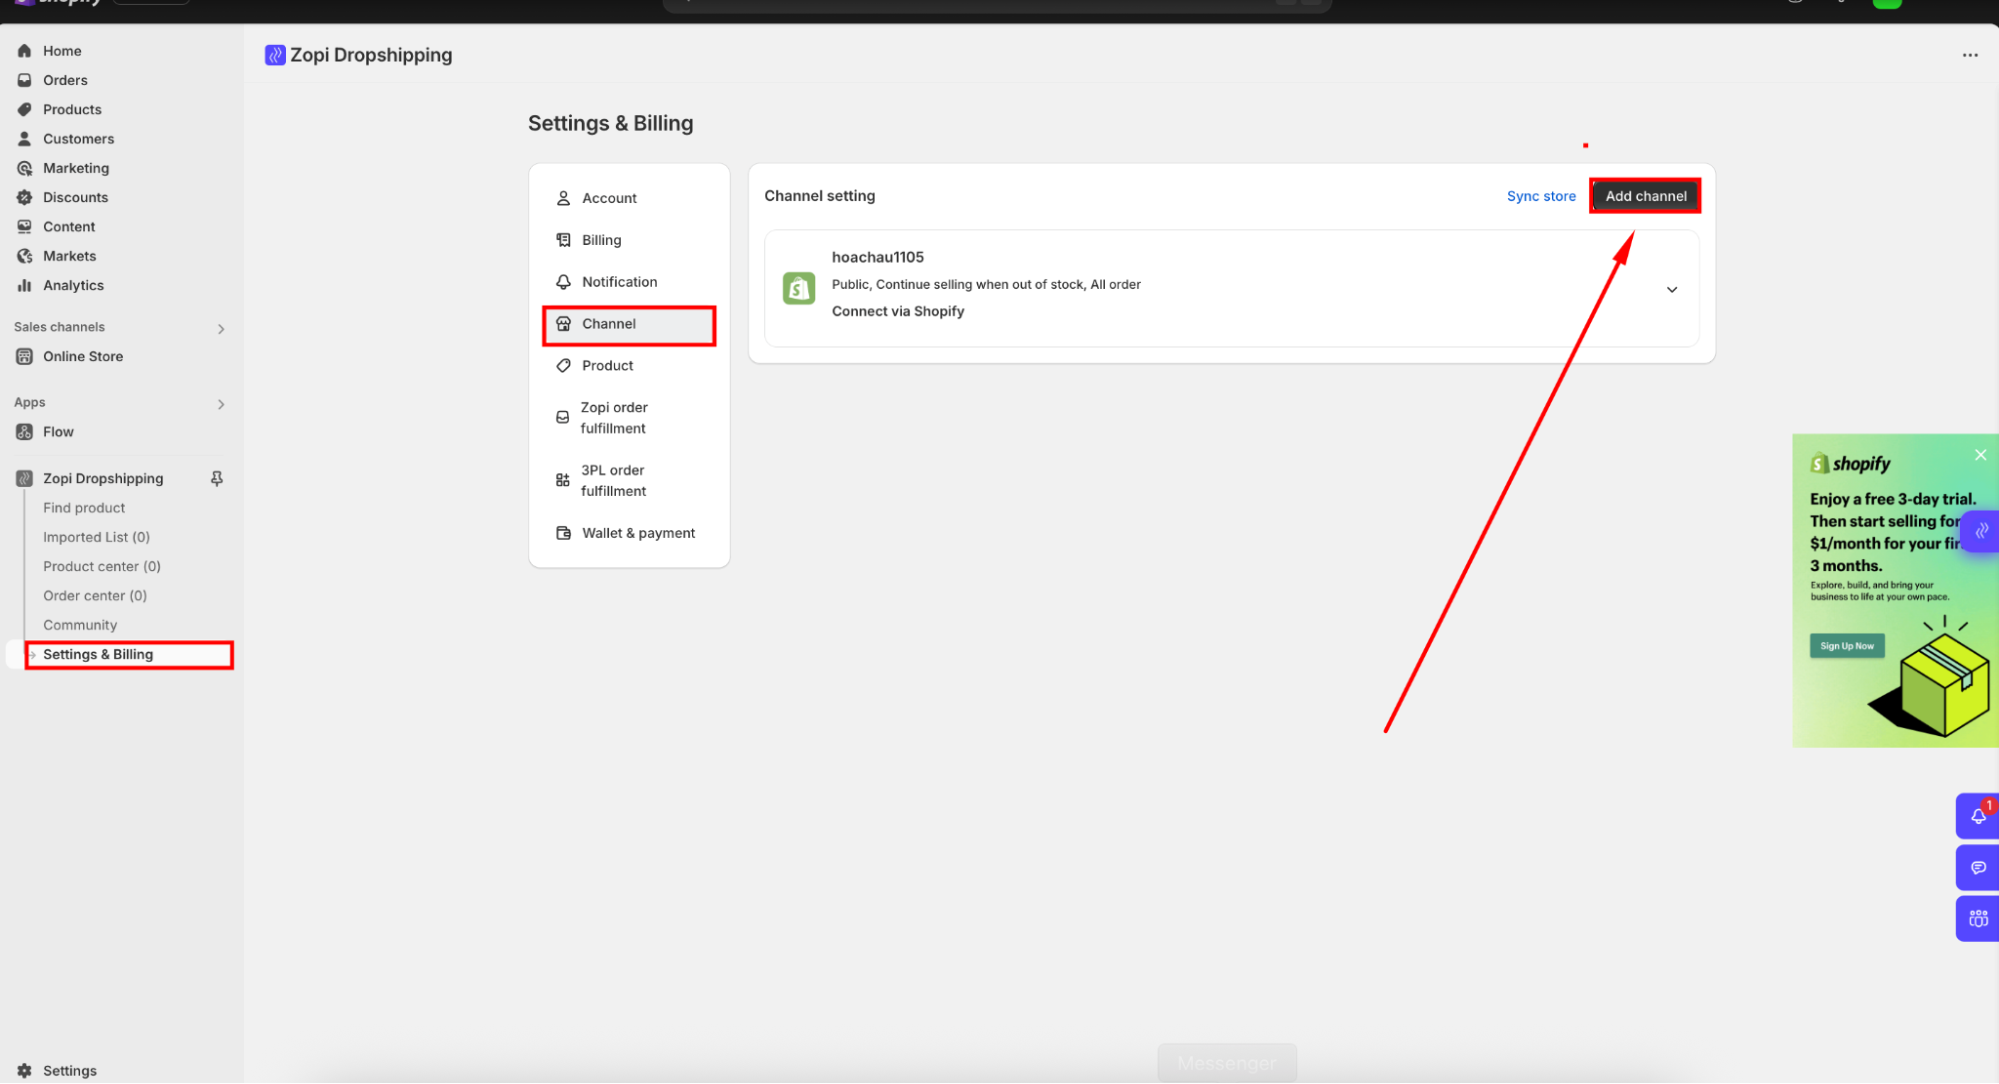
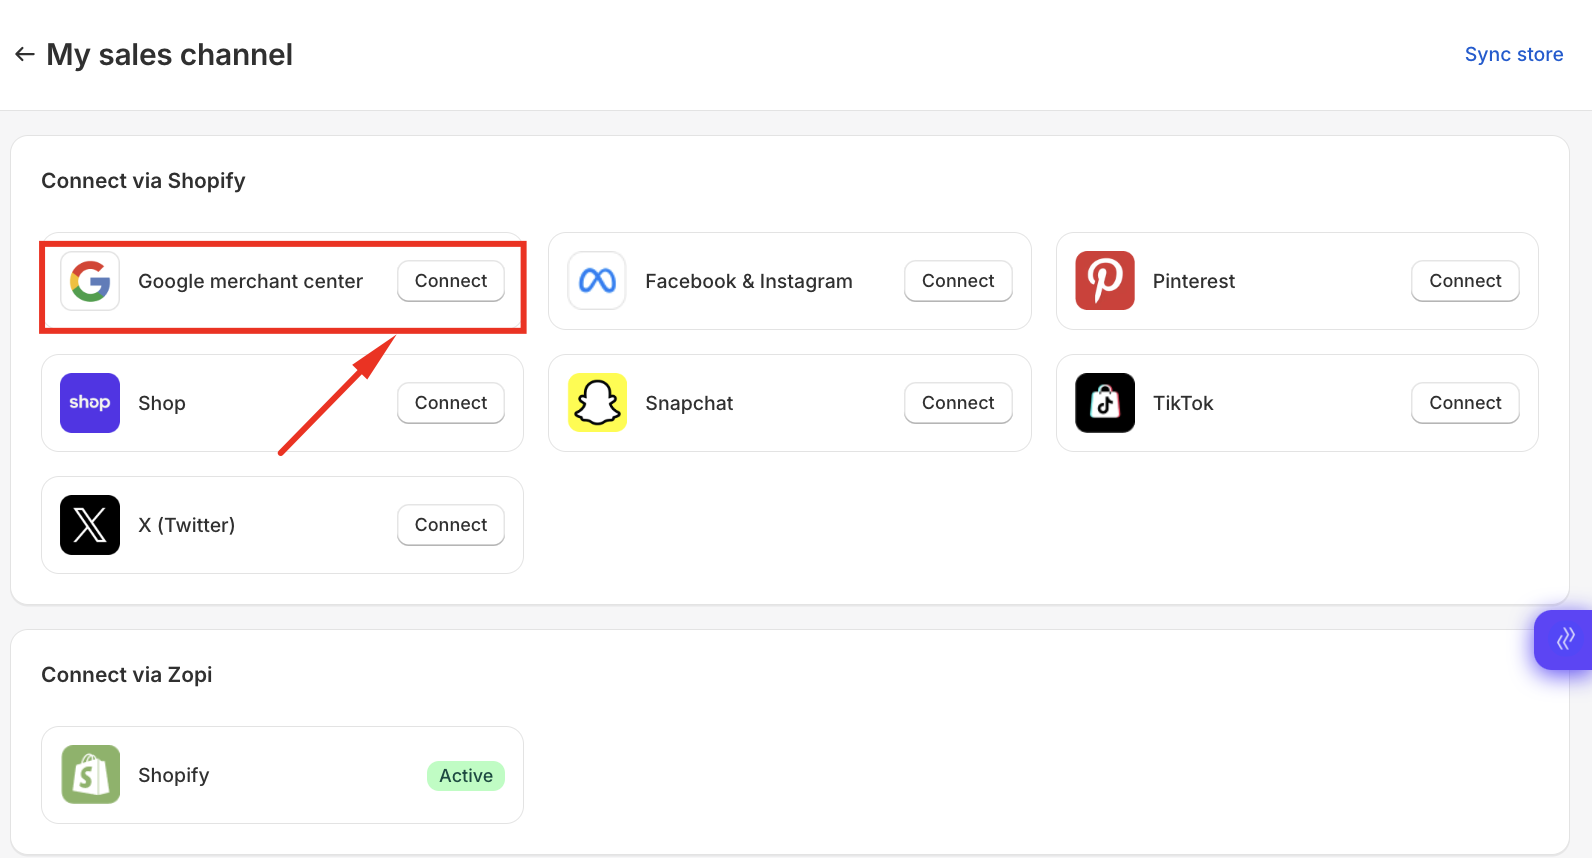
- In the pop-up window, choose Google Merchant Center and click “Connect.”
Step 3: Set up Google Merchant Center on Shopify
Once the Google Merchant Center is connected, follow the Shopify onboarding process:
- On Shopify, click “Connect Google account” to begin the Google Merchant Center setup
- Fill up the essential information to complete “Set up Merchant Center”
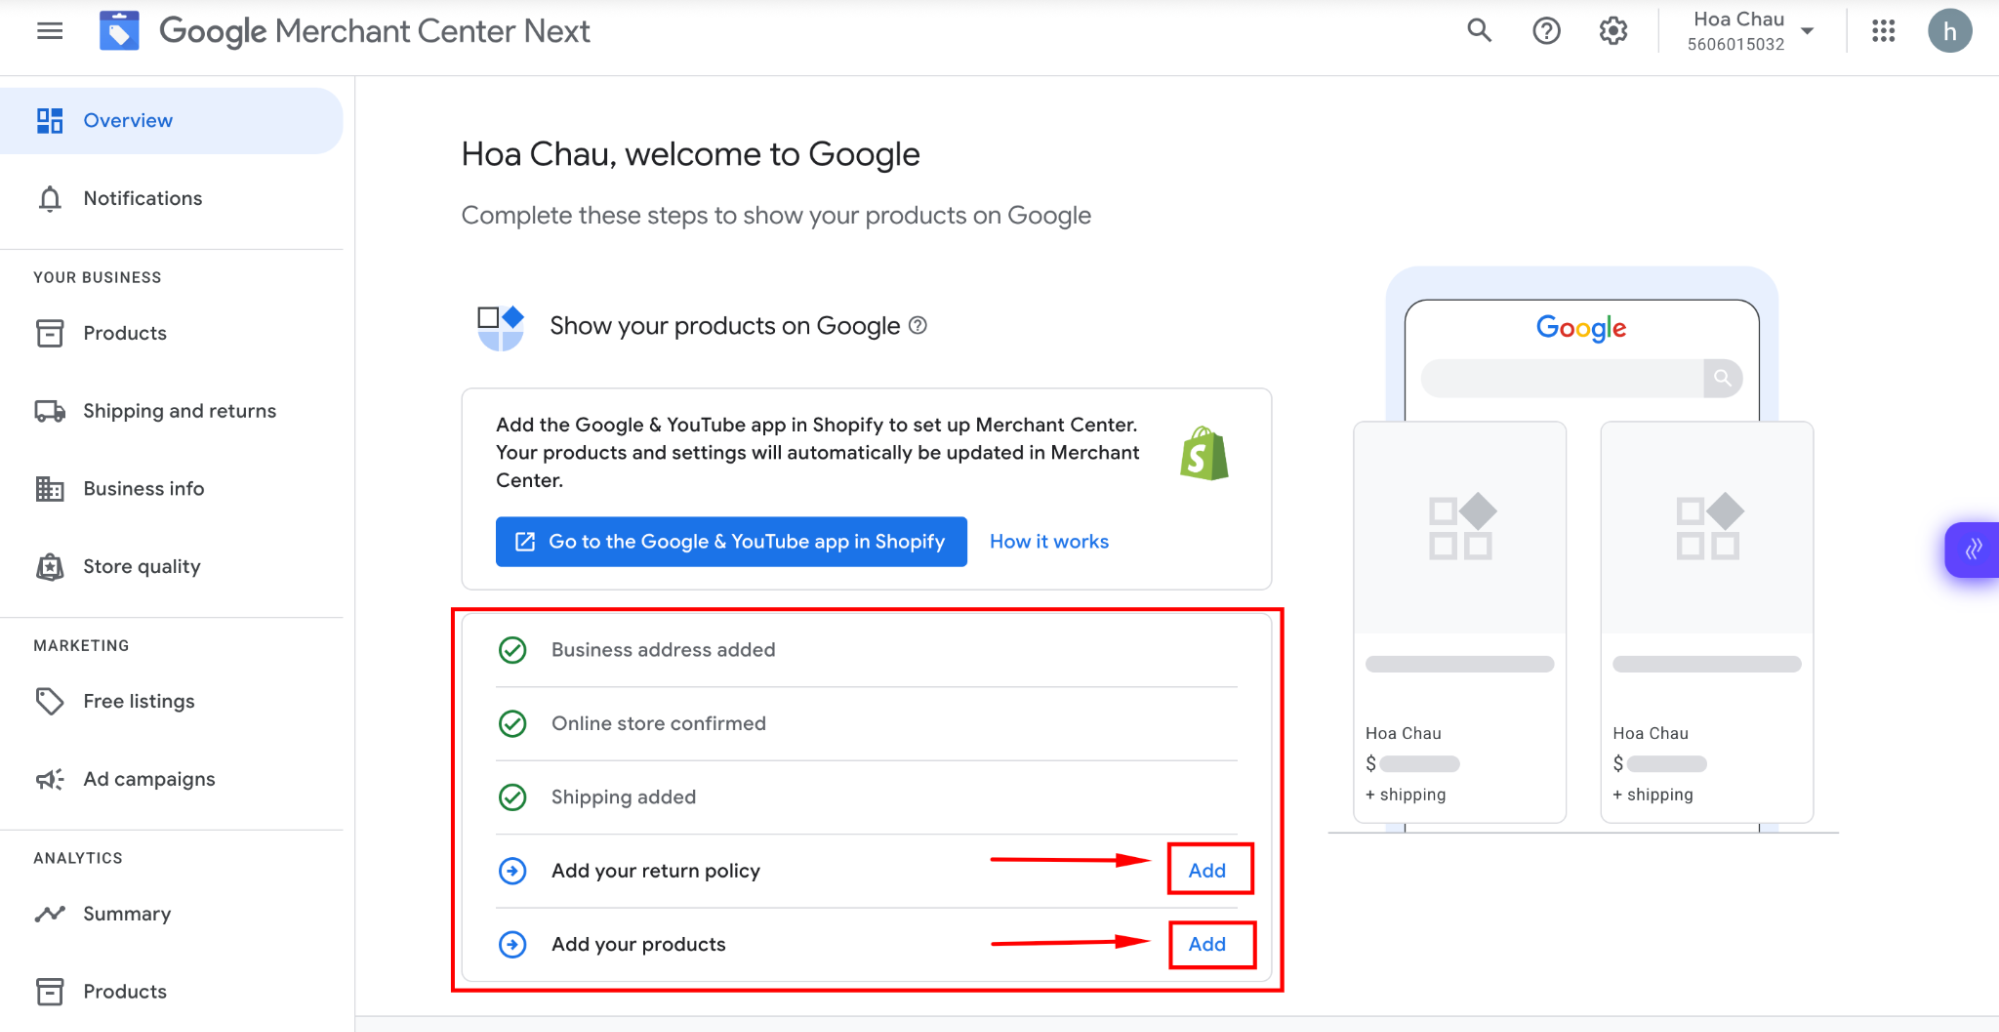
Step 4: Complete information on the Google Merchant Center website
On Google Merchant Center, click Add to complete your store profile
Step 5: Push products from the Zopi store to Google Merchant Center.
Once your Google Merchant Center is connected, you can start listing products using Zopi:
- Open the Zopi Dashboard in your Shopify admin
- Go to the Import List tab > Select the products you want to publish to Google Merchant Center
- Choose Google Merchant Center and any other channels you want to sync with
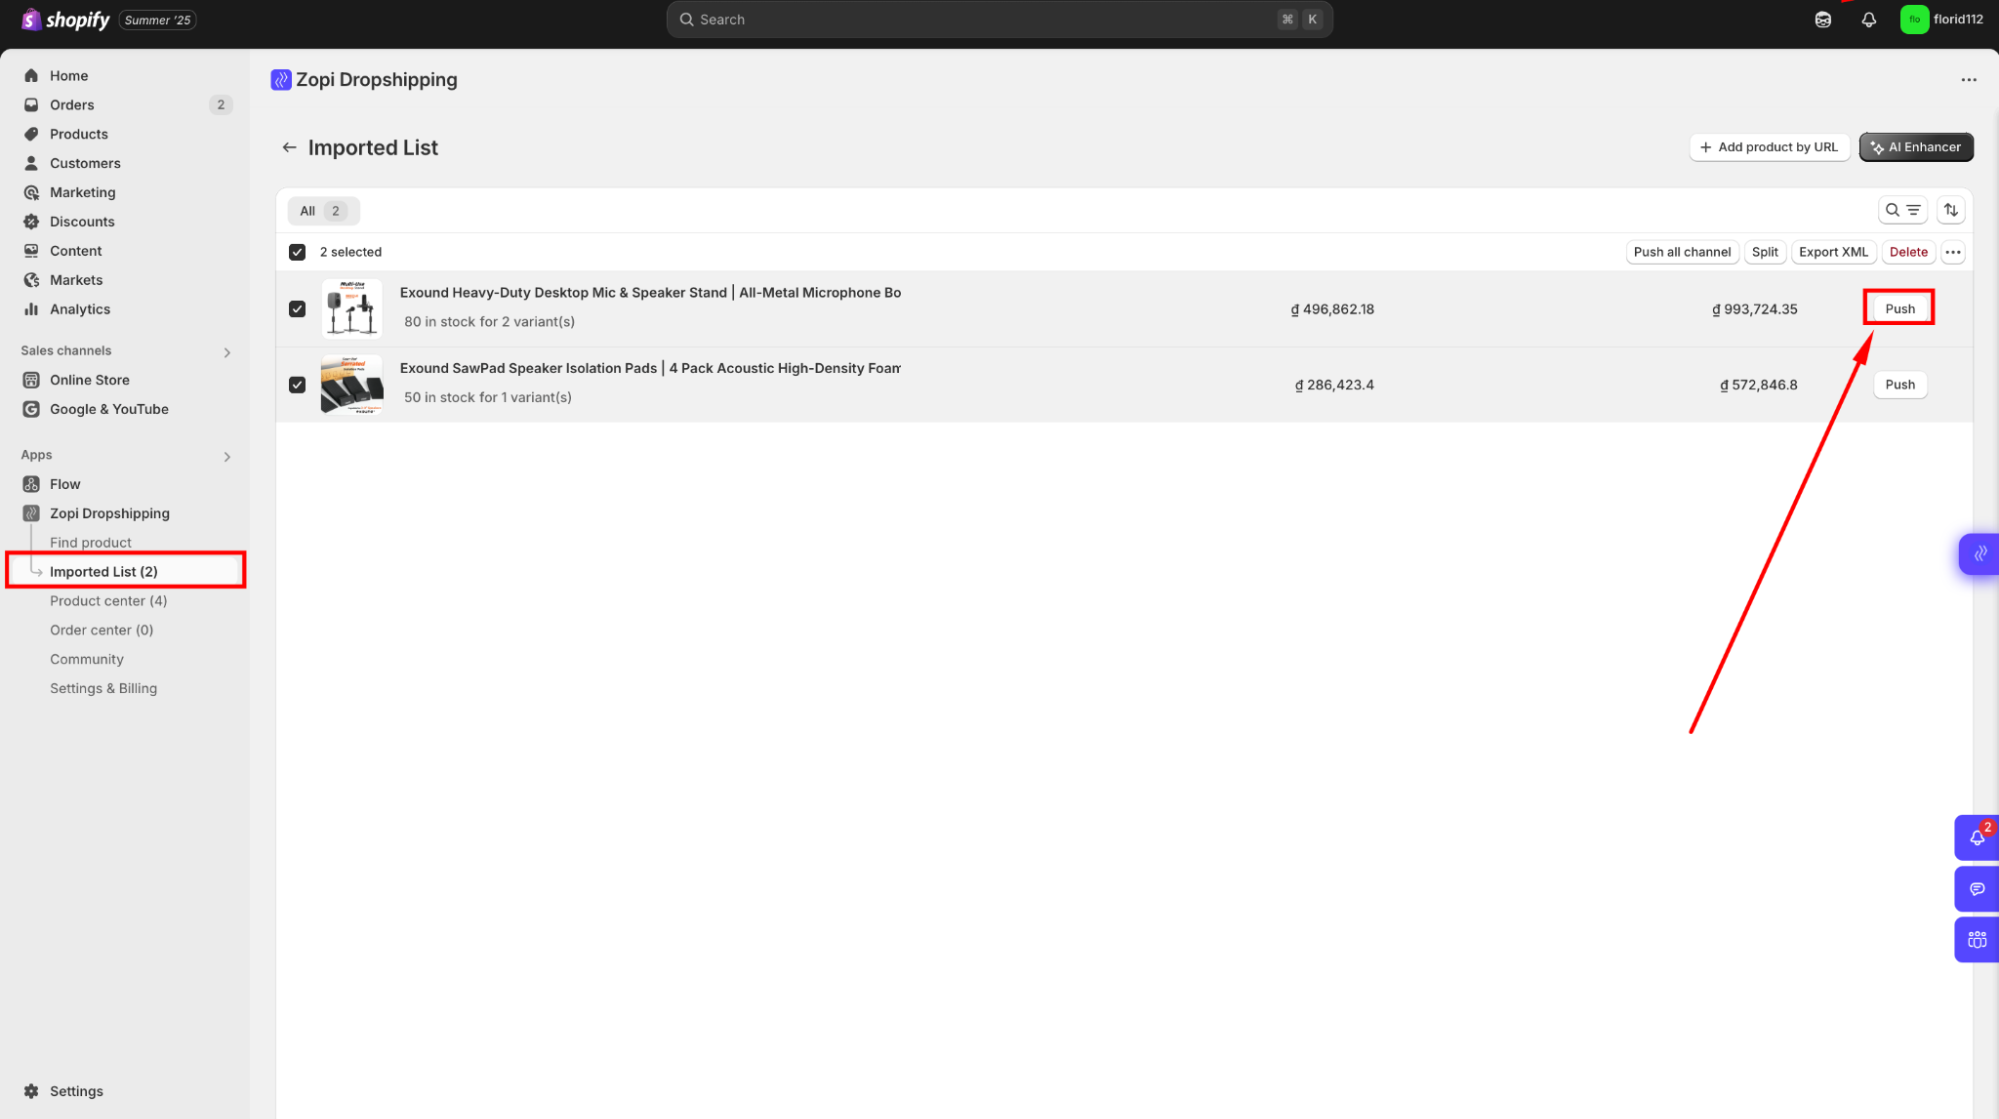
- Click on “Push to store.”
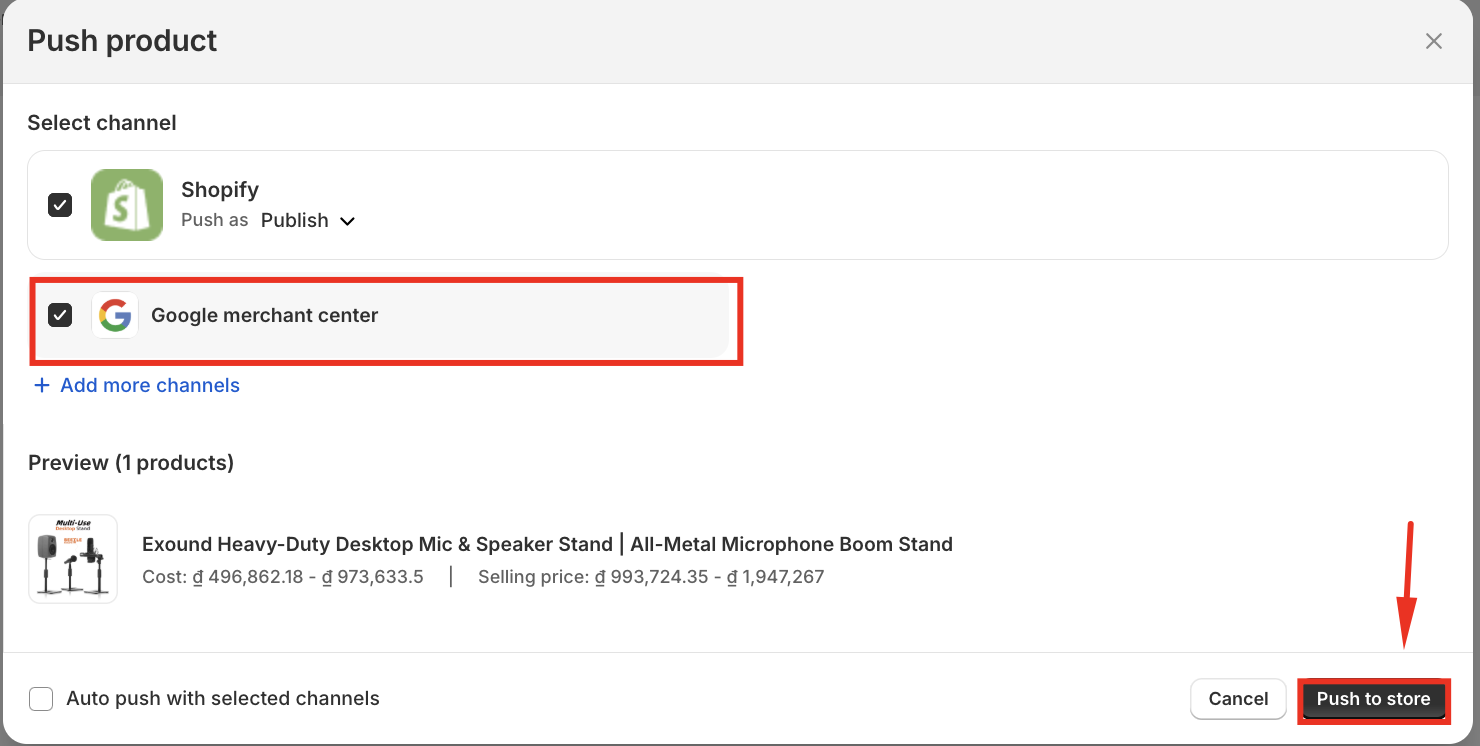
Zopi will automatically push your product details, including:
- Product Title
- Description
- Images
- Variants
- Inventory levels
Your products will now appear in your Google Merchant Center, ready to be sold!
Step 6: Manage Orders and Fulfillment
Once orders start coming in from Google Merchant Center:
- You can manage them directly from the Zopi Order Center
- Zopi syncs order status updates and tracking info automatically
Common Challenges and How to Overcome
Even though connecting Google Merchant Center to Shopify is straightforward, you may face a few challenges. Here’s how to resolve the most common ones:
Product Disapprovals or Policy Violations
Issue: Some products are disapproved due to missing information or Google’s policies.
Solution:
- Make sure each product includes GTIN/MPN, accurate titles, descriptions, and high-quality images.
- Avoid restricted products (e.g., weapons, counterfeit goods)
Feed Not Syncing Properly
Issue: Products don’t appear in Google Merchant Center after syncing from Shopify. Solution:
- Ensure the product is set as available on Google in Shopify.
- Confirm your store is connected to the correct Google Merchant Center account.
- Use Zopi’s Product Center to confirm that all product attributes are complete before publishing.
Shipping or Tax Warnings
Issue: Google flags missing shipping or tax information.
Solution:
- Go to Merchant Center > Shipping & Returns, and set clear rates for your target countries.
- In Shopify, ensure your shipping settings match the regions selected in Merchant Center.
Conclusion
Setting up Google Merchant Center on your Shopify store is a crucial step in reaching high-intent shoppers and boosting your dropshipping sales. With the help of Zopi, you can seamlessly sync your product data, optimize listings, and automate fulfillment—so you spend less time managing and more time growing.
By following the steps in this guide, you’ll be well on your way to launching successful Google Shopping campaigns that work around the clock to bring traffic to your store.