WooCommerce, the powerful e-commerce plugin for WordPress, offers complete control over your online store’s design and functionality. By integrating WooCommerce with Zopi, you can effortlessly authorize your store on the platform. Once connected, you can list products and manage orders seamlessly within Zopi.
Things to Notice Before You Begin
Before connecting your WooCommerce store to Zopi, ensure you have completed the following prerequisites:
- You have installed and activated the WooCommerce plugin on your WordPress site.
- You have logged in to Zopi.
How to Add Your WooCommerce Store to Zopi
Follow these steps to successfully add your WooCommerce store to Zopi:
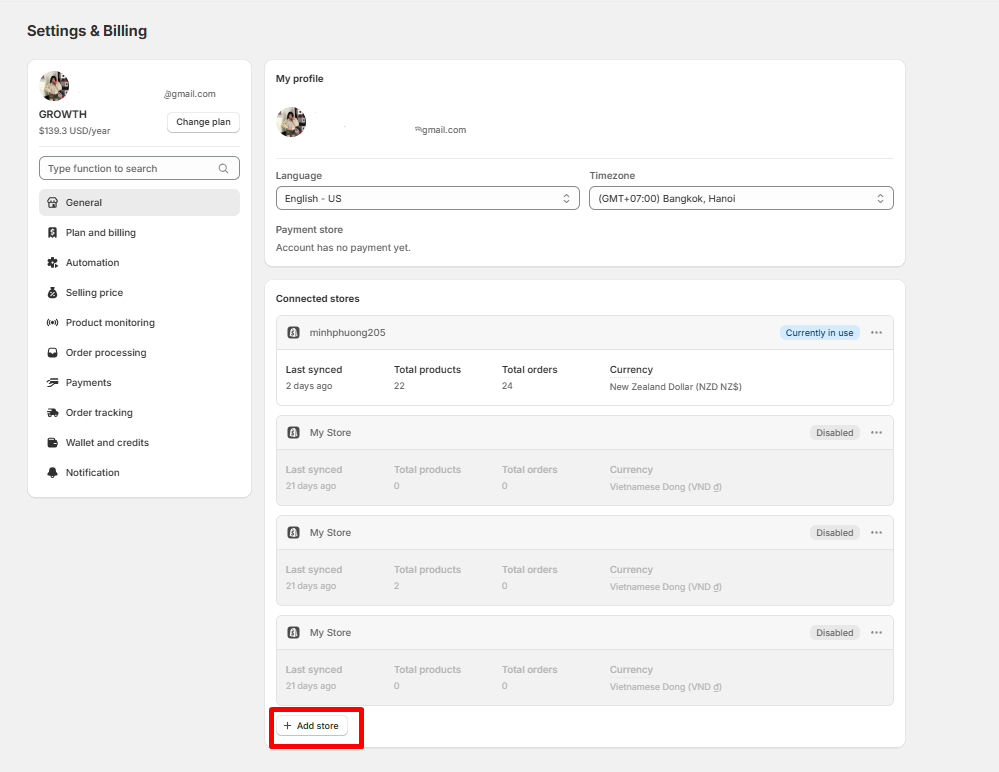
- Step 1: Log in to Zopi and navigate to Settings & Billing -> tab General
- Step 2: Locate the WooCommerce option and click Connect.

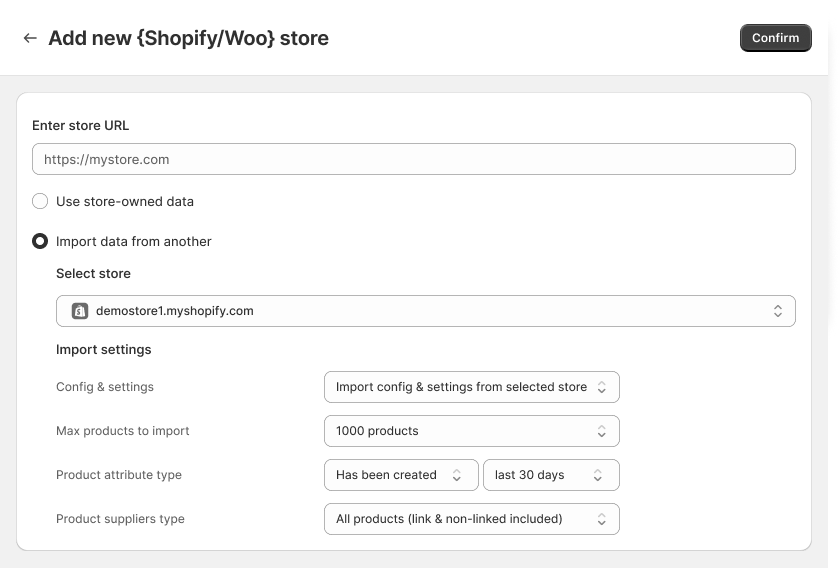
- Step 3: In the pop-up window, add your store URL and click Confirm.
- Step 4: On the authorization page, click Approve.
Ensure that the store URL you enter matches what’s visible in your WordPress admin under “Settings” → “General”. Your store URL will typically appear in one of these formats:
- https://yourstore.com
- https://www.yourstore.com/
Note: Use only the specific URL formats listed above. Avoid entering URLs that direct to specific pages, such as “https://yourstore.com/store” or “https://yourstore.com/shop”. The URL should represent your main store address without any additional page specifications.
You have successfully set up your WooCommerce store! You can now seamlessly add, push products, and place orders from Zopi.
If you encounter any issues during the process, feel free to reach out to our Support team via the Live chat window on the right side of the screen or email us at [email protected] for instant assistance.