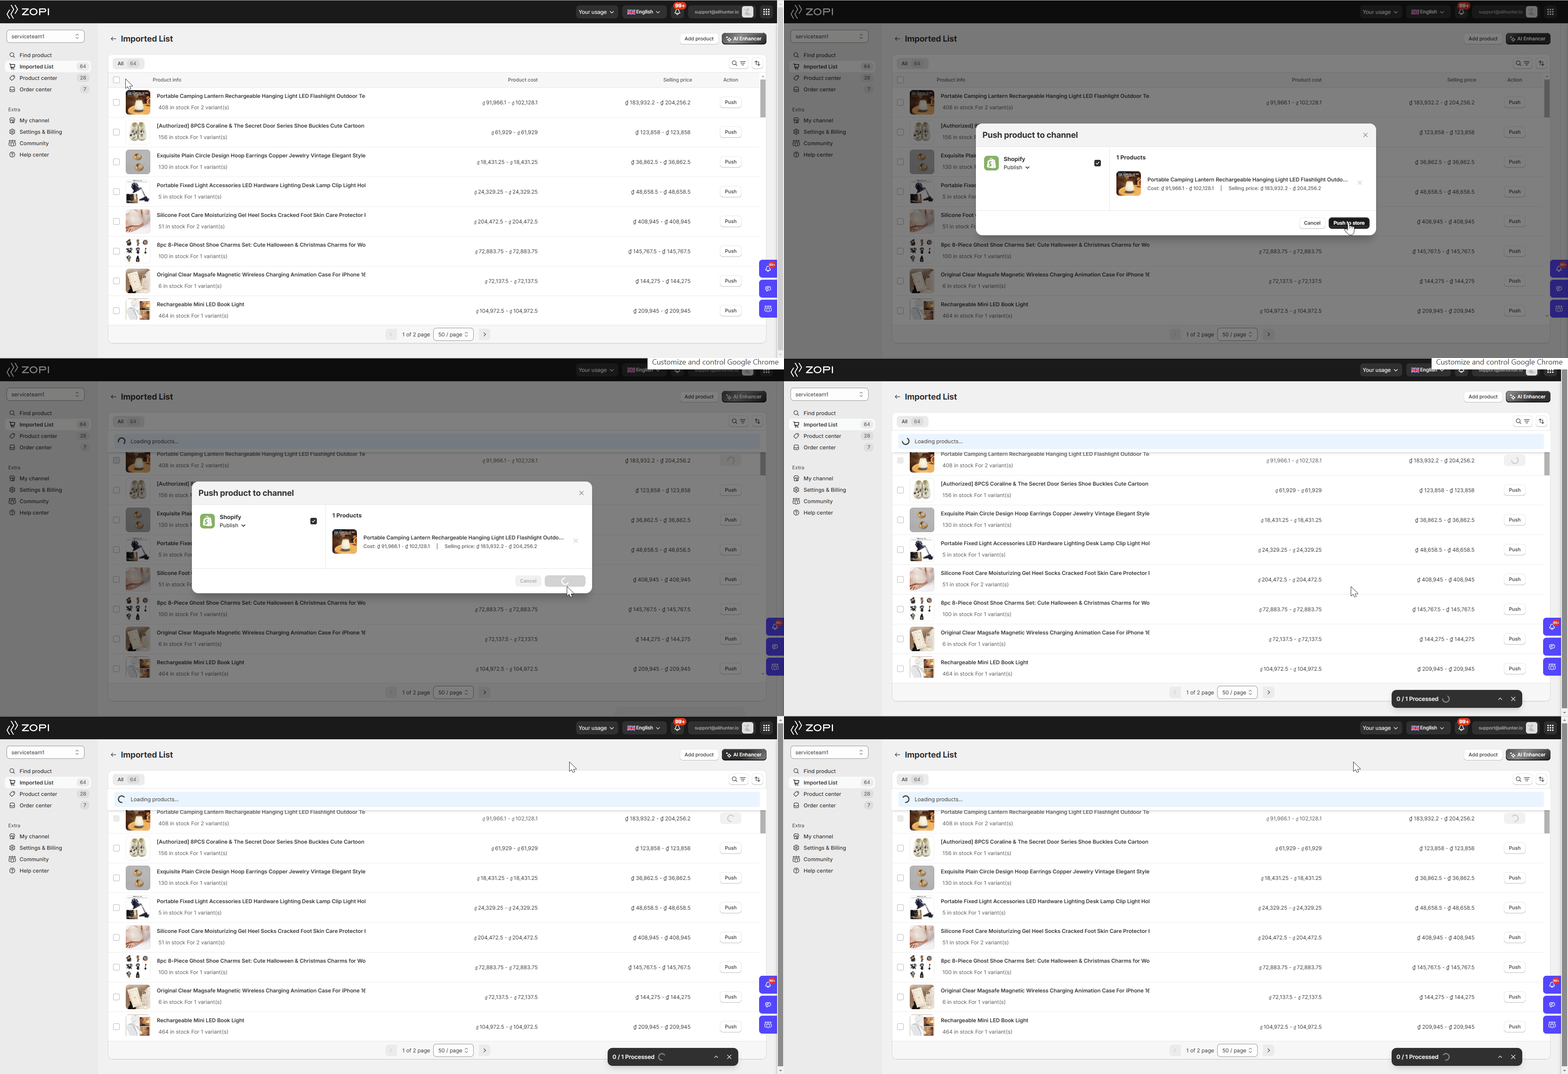
After adding a product, Zopi efficiently imports the product’s information, including the description, variants, and images. You can find this product in the Imported List. Here, you have the option to retain the original information or customize it for a more polished and professional appearance. Once you’re satisfied with the details, the next step is to push the products from Zopi to your store.
How to Push Products to Shopify
Step-by-Step Guide to Push Products
- From your Zopi dashboard, navigate to the Imported List.
- Hover over the Product Card and click the Push button in the action area to push an individual product to your store.
- In the pop-up window, select your desired sales channel and click Push to store.

IMPORTANT NOTE:
- If you are editing product details in the Product Editor window, you can also directly click the Push to store button to push your products.
- Alternatively, check the box on the Product Card and click on Push all products to bulk push products. To unlock the Push all products feature, you’ll need to upgrade to the Starter plan or higher.
- You cannot push a product with more than 100 variants because Shopify has a limit of 100 variants per product. Each product can have up to three options, and the total number of combinations of these options cannot exceed 100 variants. You need to split the product into multiple products or reduce the number of variants to comply with this limit. Read this guide for detailed steps.
- The product will become visible to all your customers if you directly publish it to your online store. If you only push it as Unpublished Products, it will appear in the backend of your store, where you can edit or manage it before making it visible to all your customers. Learn more here.
Once you’ve completed these steps, you can go to the Mapped section in Product Center to view the products you just pushed. The products will also be displayed on your store’s products page.

Free shipping
Hey guys, I’m Yousouf. I want my shipping project to developed.