
Managing large volumes of orders can quickly become overwhelming, especially when you need to track specific orders across different fulfillment stages. With Custom Order Status Views in Zopi, merchants can organize and monitor orders more efficiently by creating personalized order views based on starred labels.
This feature helps dropshippers quickly identify priority orders, group specific shipments, and streamline daily order management without relying only on default order statuses.
What are Custom Order Status Views?
Custom Order Status Views allow merchants to create personalized order filters inside the Place Order section in Zopi. Instead of using only the default order statuses, you can organize orders into custom views using colored stars.
For example, you can create views for:
- Urgent orders
- VIP customer orders
- Orders waiting for supplier confirmation
- Orders requiring manual review
- High-value shipments
These views automatically update based on the star labels you apply to orders.
Step-by-Step Guide to Create Custom Order Status Views Using Zopi
Follow the steps below to create your own custom order views inside Zopi.
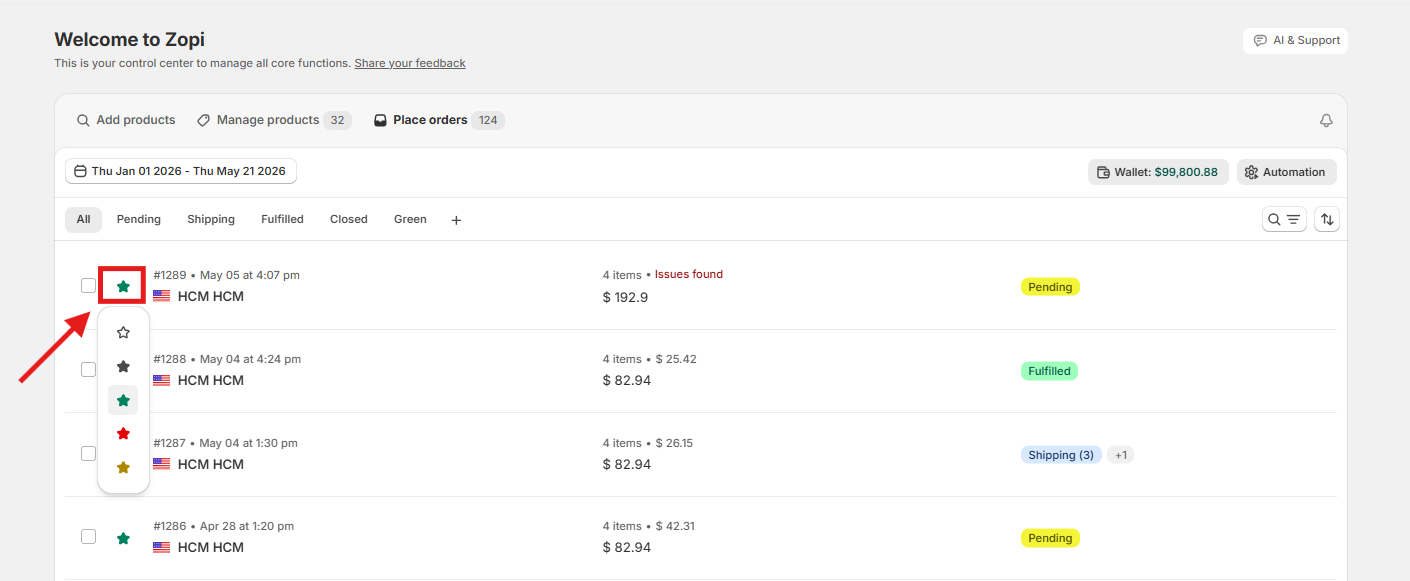
Step 1: Add a Star Color to Orders
Before creating a custom view, you need to mark the orders you want to group together.
To do this:
- Go to the Place Order section in Zopi
- Find the orders you want to organize
- Add a colored star label to those orders
You can use different star colors for different purposes. For example:
- Red star = Urgent orders
- Yellow star = Orders needing review
- Blue star = VIP customers
Step 2: Filter Orders by Star Color
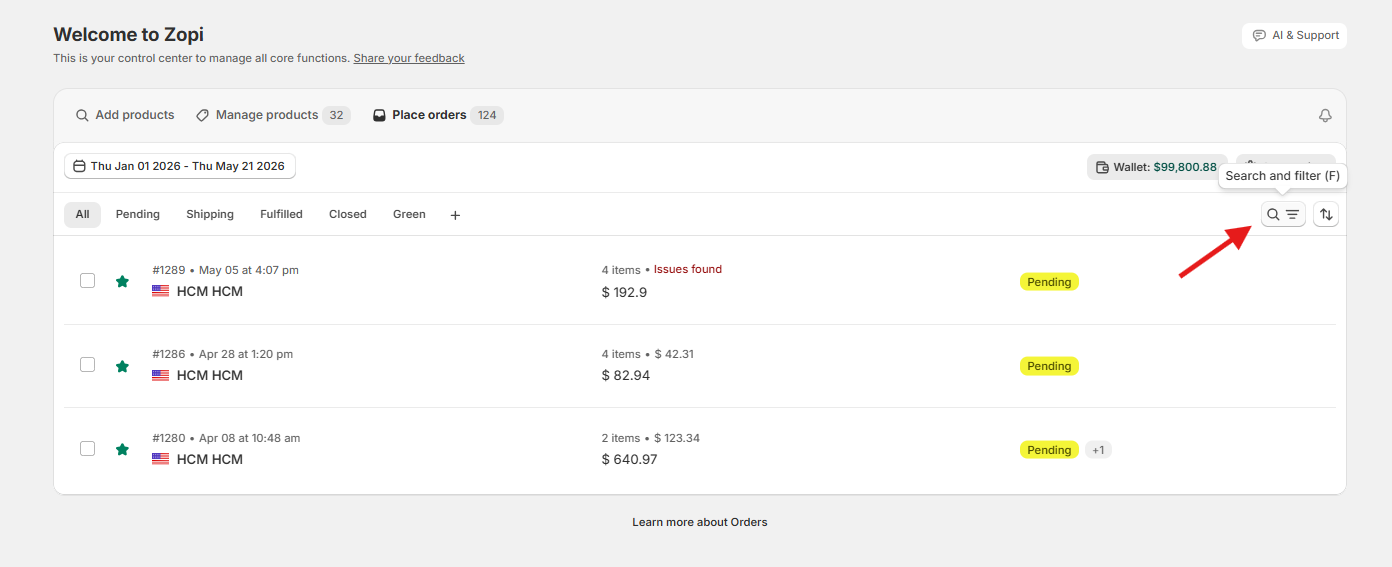
Once your orders are starred, you can filter them using the search bar.
Here’s how to filter starred orders:
- Click the search bar in the Place Order section
- Select the star color you want to filter
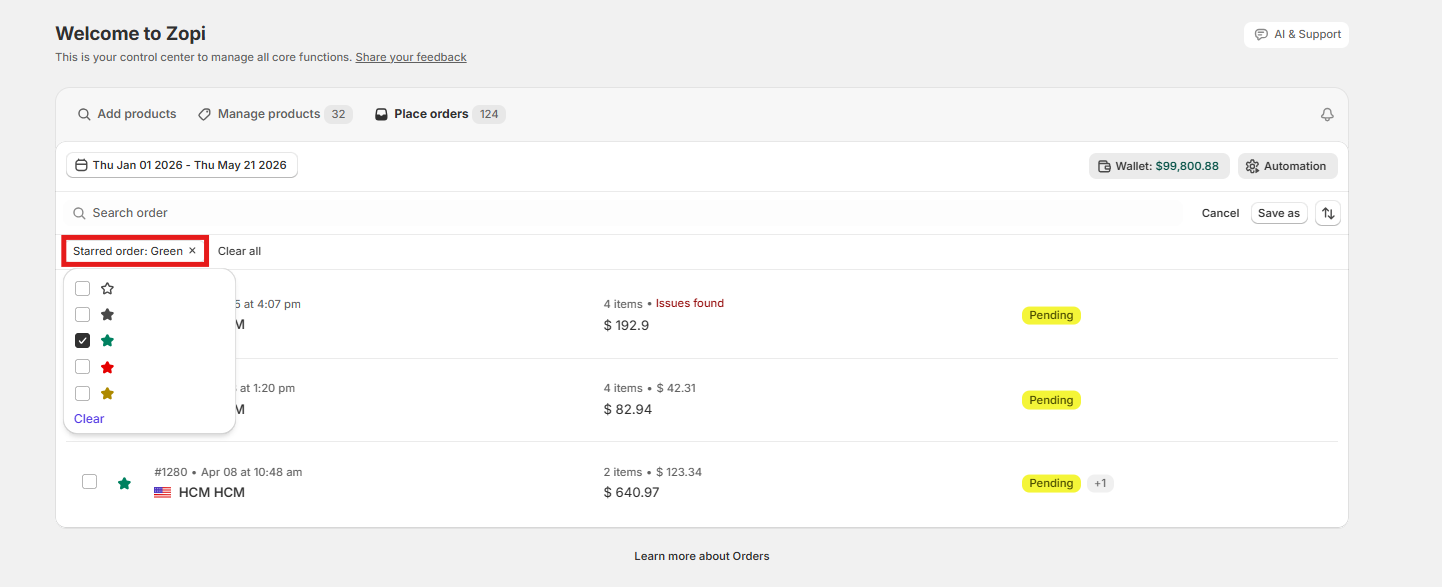
- Zopi will display all orders marked with that star
This helps you isolate specific groups of orders instantly.
Step 3: Create a Custom Order View
- Click on Save as button to add a new view
- Name the view and Save
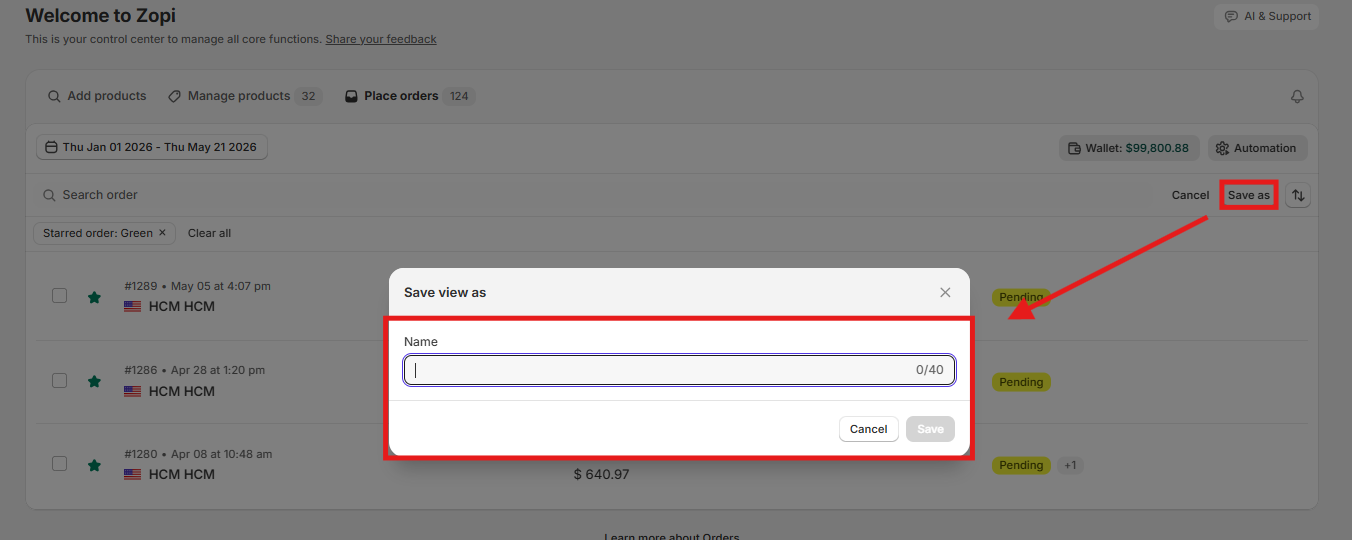
Your new custom view will now appear in the order management panel.
Whenever you open this view, Zopi will automatically show all orders with the selected star color.
How Dynamic Order Updates Work
Custom Order Status Views update automatically based on your star labels.
Here’s how the system behaves:
- If you remove the star color from an order:
- The order will automatically disappear from the custom view
- If you add the same star color to another order:
- The order will automatically appear inside that custom view
This dynamic filtering helps merchants maintain accurate order tracking without manually updating views.
Common Challenges and How to Overcome Them
Some merchants may notice orders disappearing from their custom views unexpectedly. In most cases, this happens because the assigned star color was removed.
To avoid confusion:
- Double-check the star label before removing it
- Use consistent color meanings across your team
- Create naming conventions for custom views
For example:
- “Urgent Orders”
- “Supplier Follow-up”
- “Manual Processing”
This keeps your order workflow organized and easy to manage.
Conclusion
Custom Order Status Views in Zopi make order management faster, cleaner, and more efficient. By combining star labels with saved filters, merchants can create personalized workflows that simplify fulfillment and improve daily operations.
Try using Custom Order Status Views in your Zopi dashboard to organize orders more effectively and keep your fulfillment process under control. If you need additional help, visit the Zopi Help Center for more guides and tutorials.