Do you have multiple stores? In some scenarios, you may need to manage all your products and orders in one place. Zopi allows you to manage all your online stores from a single account, streamlining your dropshipping experience and increasing efficiency.
Before we get started, take note that there are a few common requirements:
+ Add a new free store to a paid store.
+ Add a new free store to another free store.
Now, let’s cut to the chase to see how to do so.
How to add a new store
Method 1: In the Embedded App
Steps
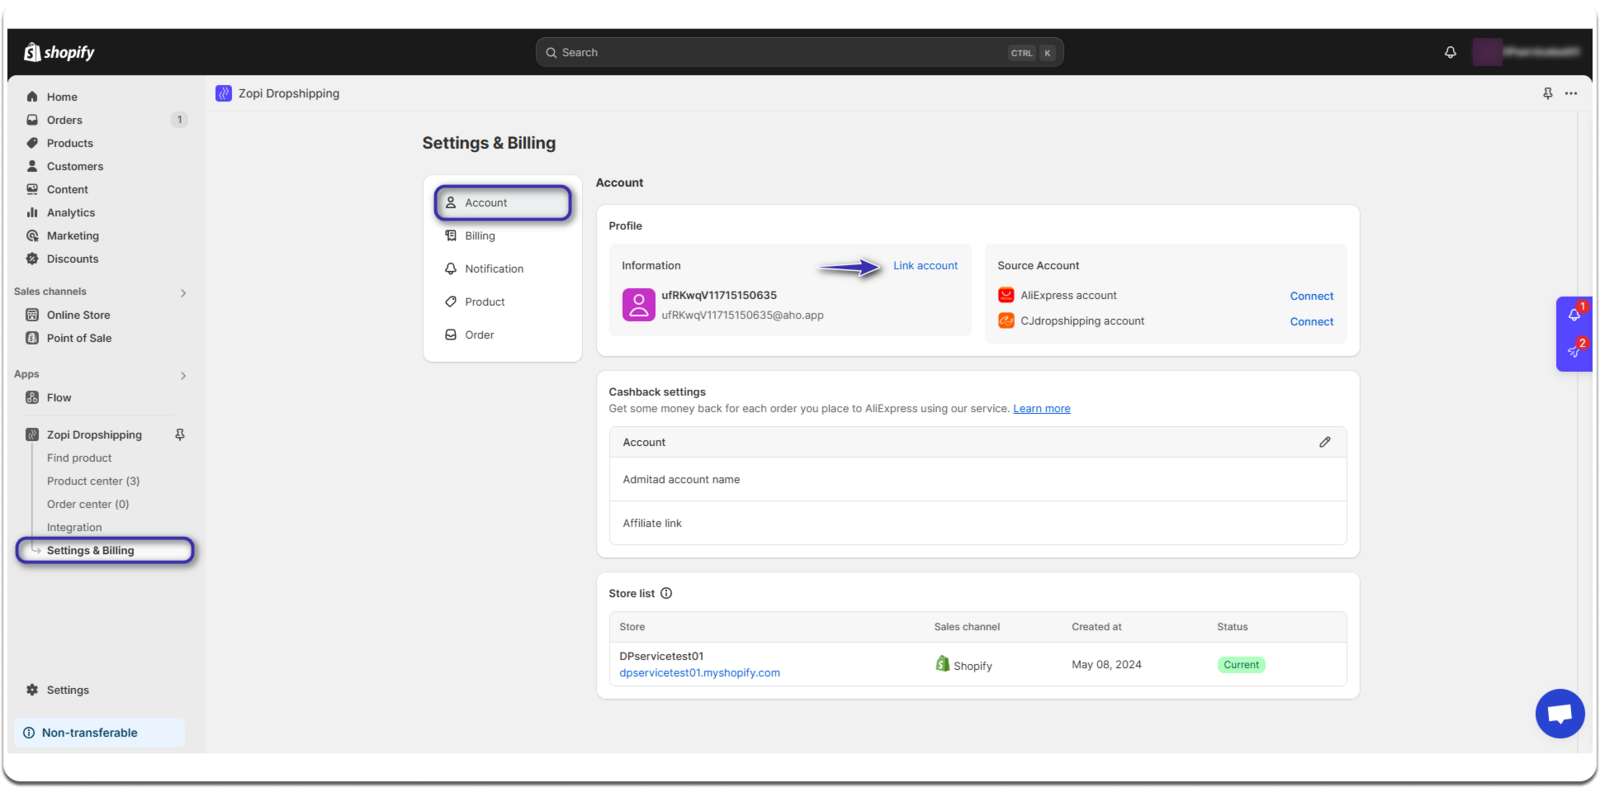
- In the Zopi dashboard, go to the Settings & Billing page > Account.
- Click Link account.

3. Enter your information to log in, or sign in with your Google/Facebook account, then click on Confirm button.
When you create a Zopi account, a virtual email address is automatically generated for you. This allows you to use a custom domain name (e.g., [email protected]) in the Embedded App. Therefore, you need to log in manually or use your Google/Facebook account to update it to your actual email address.
In case you’re unable to add the store for any reason, don’t hesitate to contact our Support team for assistance.
Method 2: In the Zopi Web App
Steps
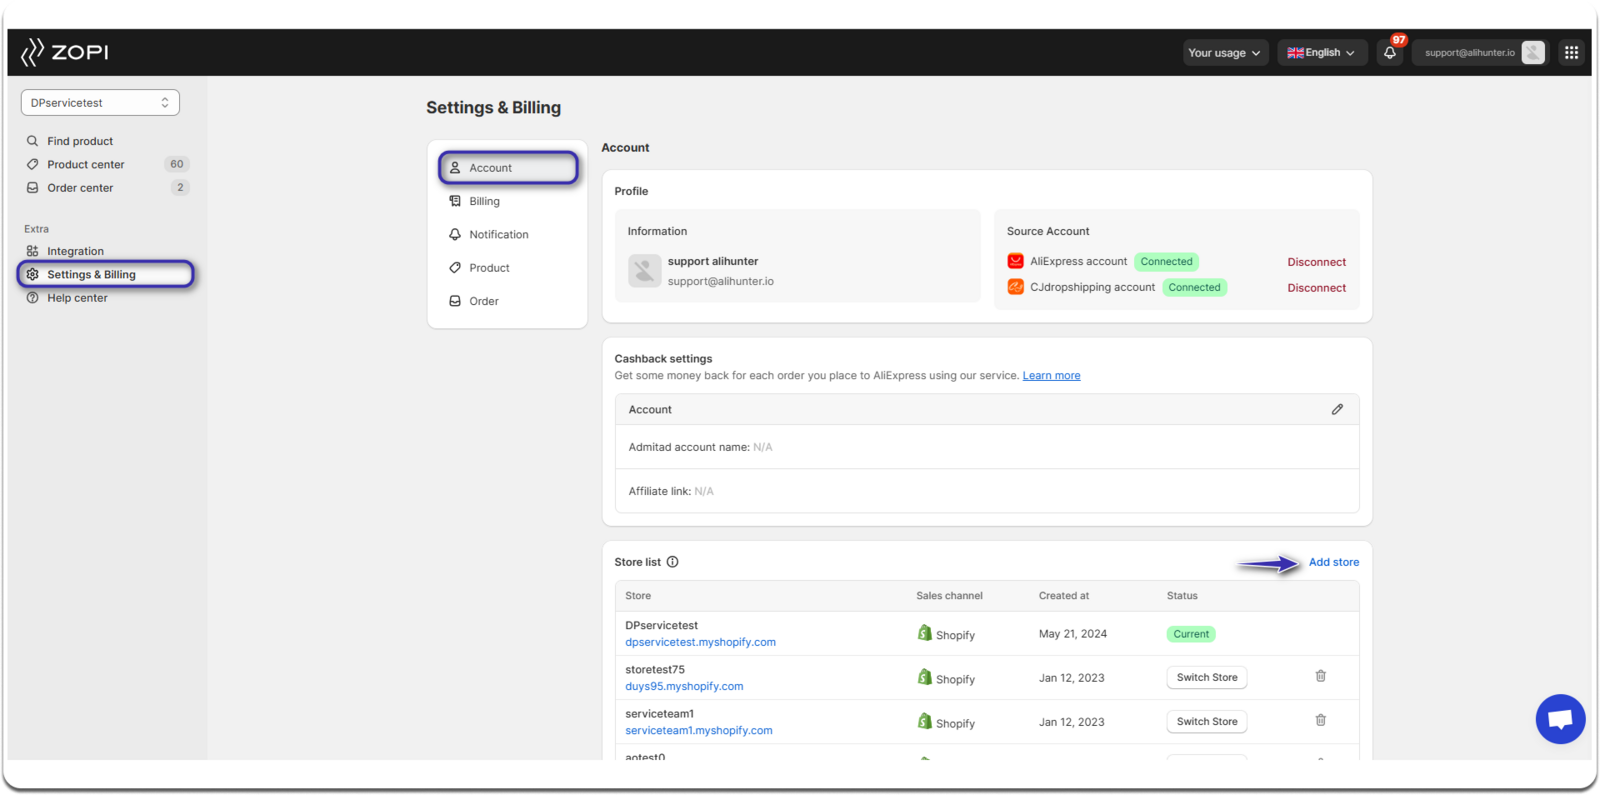
- In the Zopi dashboard, go to the Settings & Billing page > Account.
- Click Add store.
 3. Enter the Shopify store URL of the shop you want to connect.
 4. Click Add store once more.
IMPORTANT NOTE:
* The store you want to add has either removed the app or has not been linked to any account before.
* Zopi app is currently optimized for Shopify, when you want to sign in to Zopi web app, please connect with our Support team to update your email internally first. Check this article to learn more.
The good news is, you can connect an unlimited number of stores under a single Zopi account. Once you’ve successfully added the new store to your account, you can easily switch between your stores by clicking the ‘Switch store’ button.
