What is Zopi? - All-in-one Dropshipping solution

How to Add Another Shopify Store to Zopi

Update on: 23/10/2025

Table of contents

Step-by-Step Guide to Add Another Shopify Store in Zopi

If your Zopi account is already connected to a Shopify store and you want to expand by adding another Shopify store, Zopi makes it easy—as long as you’re on the Pro plan or higher, which supports multiple store connections. This guide explains how to add an additional store, the connection options, and all import settings so you can manage products efficiency.

Step-by-Step Guide to Add Another Shopify Store in Zopi

Follow these steps to connect an additional Shopify store:

Step 1: Verify Your Plan

Ensure you’re on Pro plan or higher.

Step 2: Access Store Settings

  • Log in to Zopi.
  • Go to Settings & Billings.

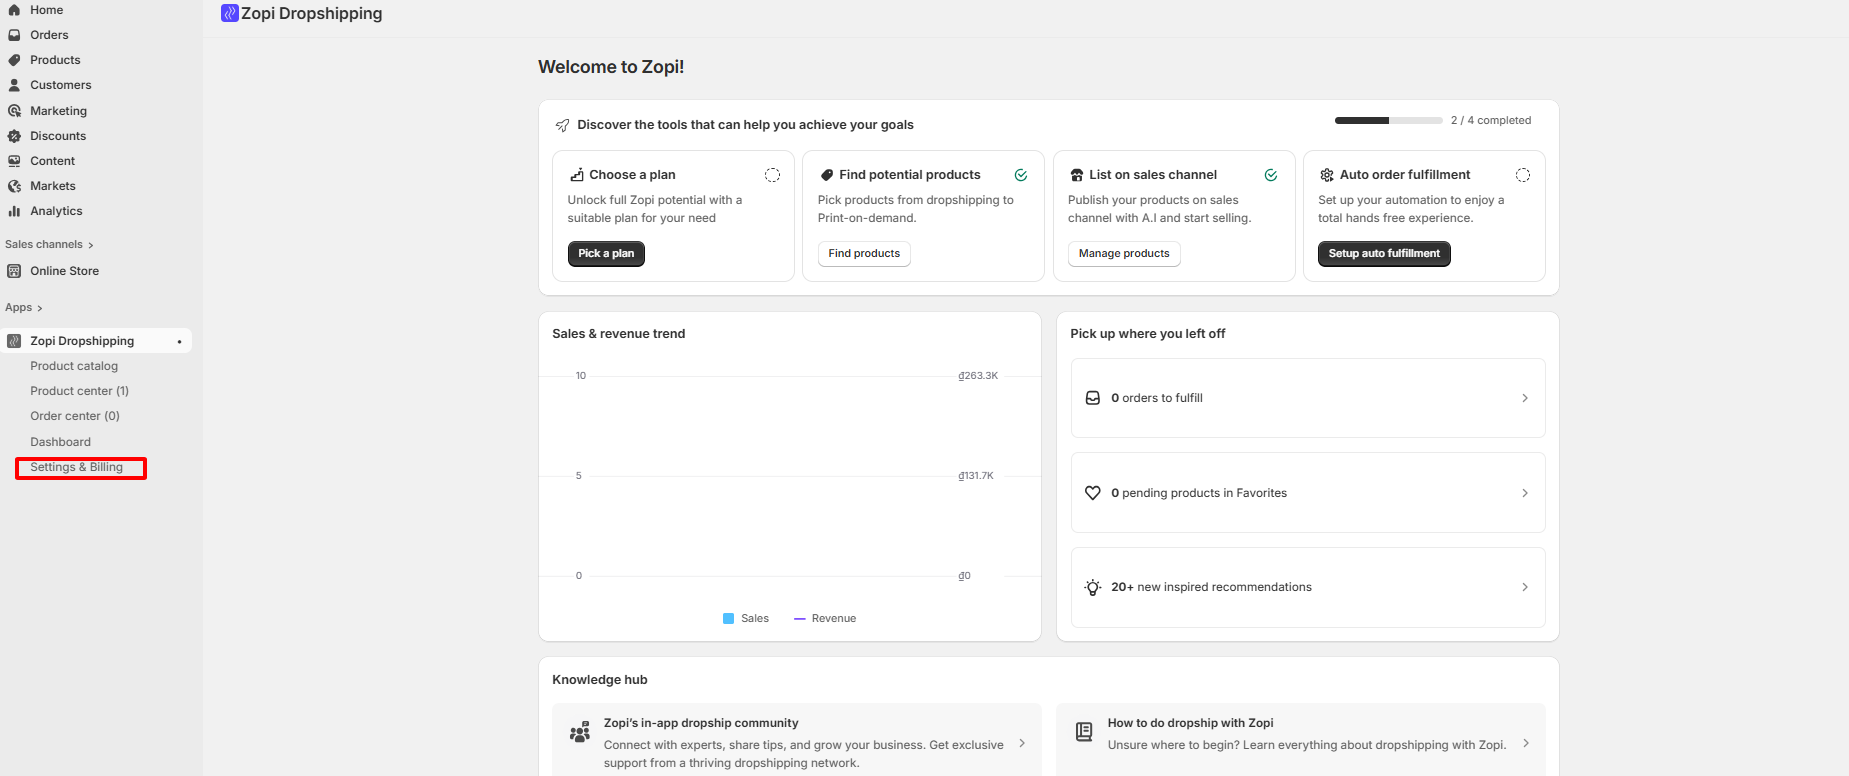
  • Click on the General tab.
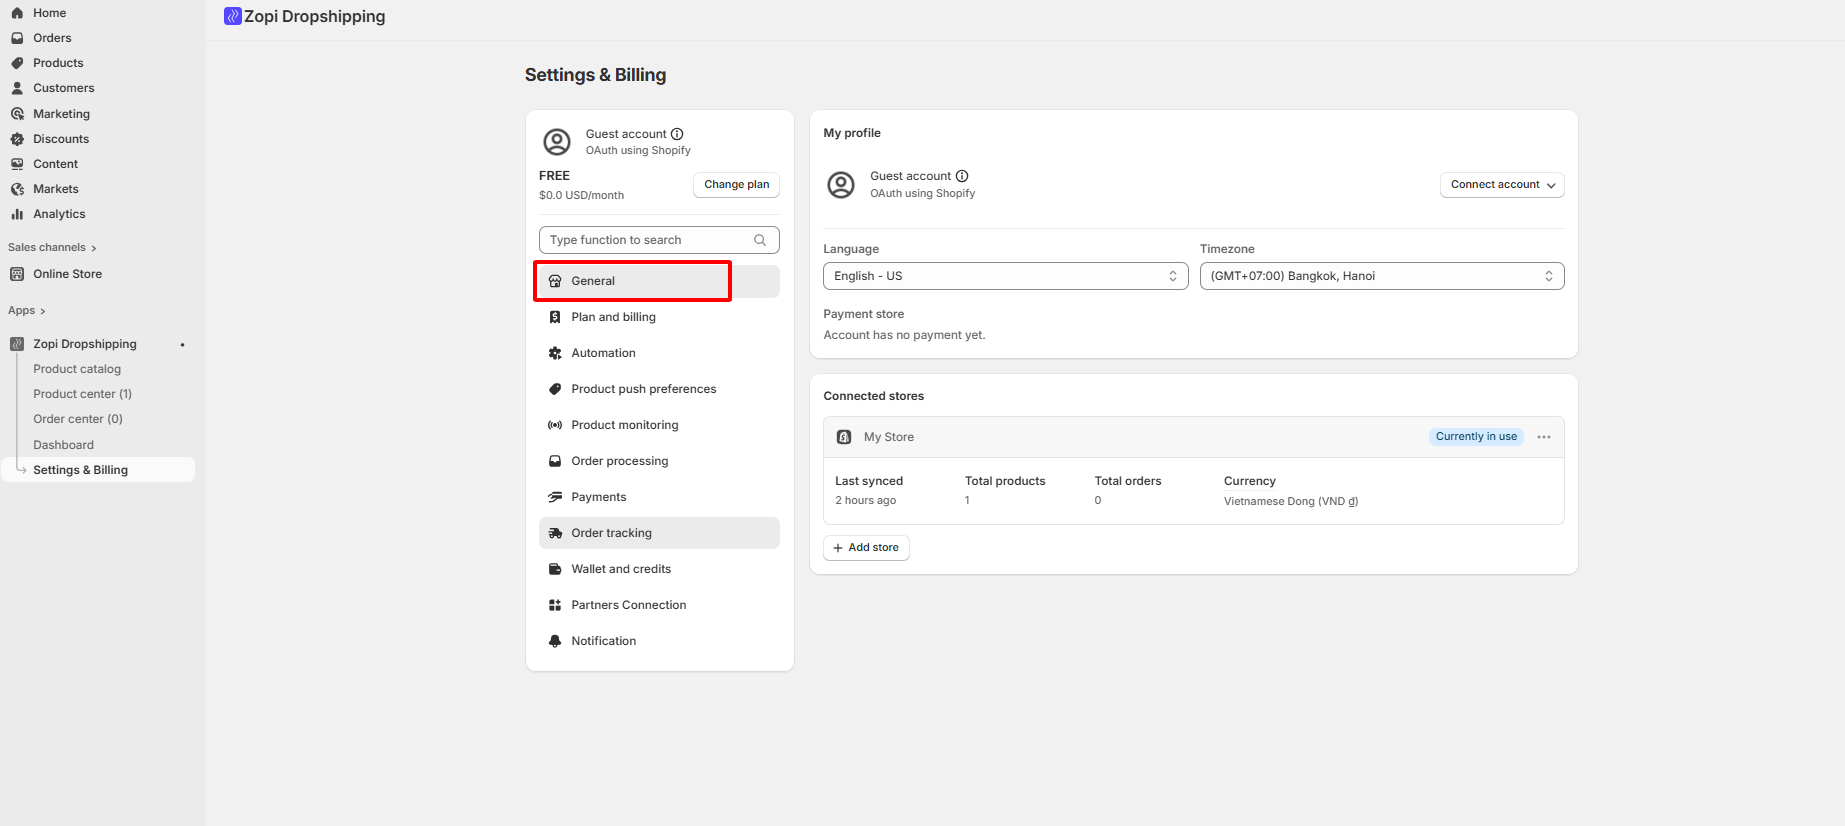
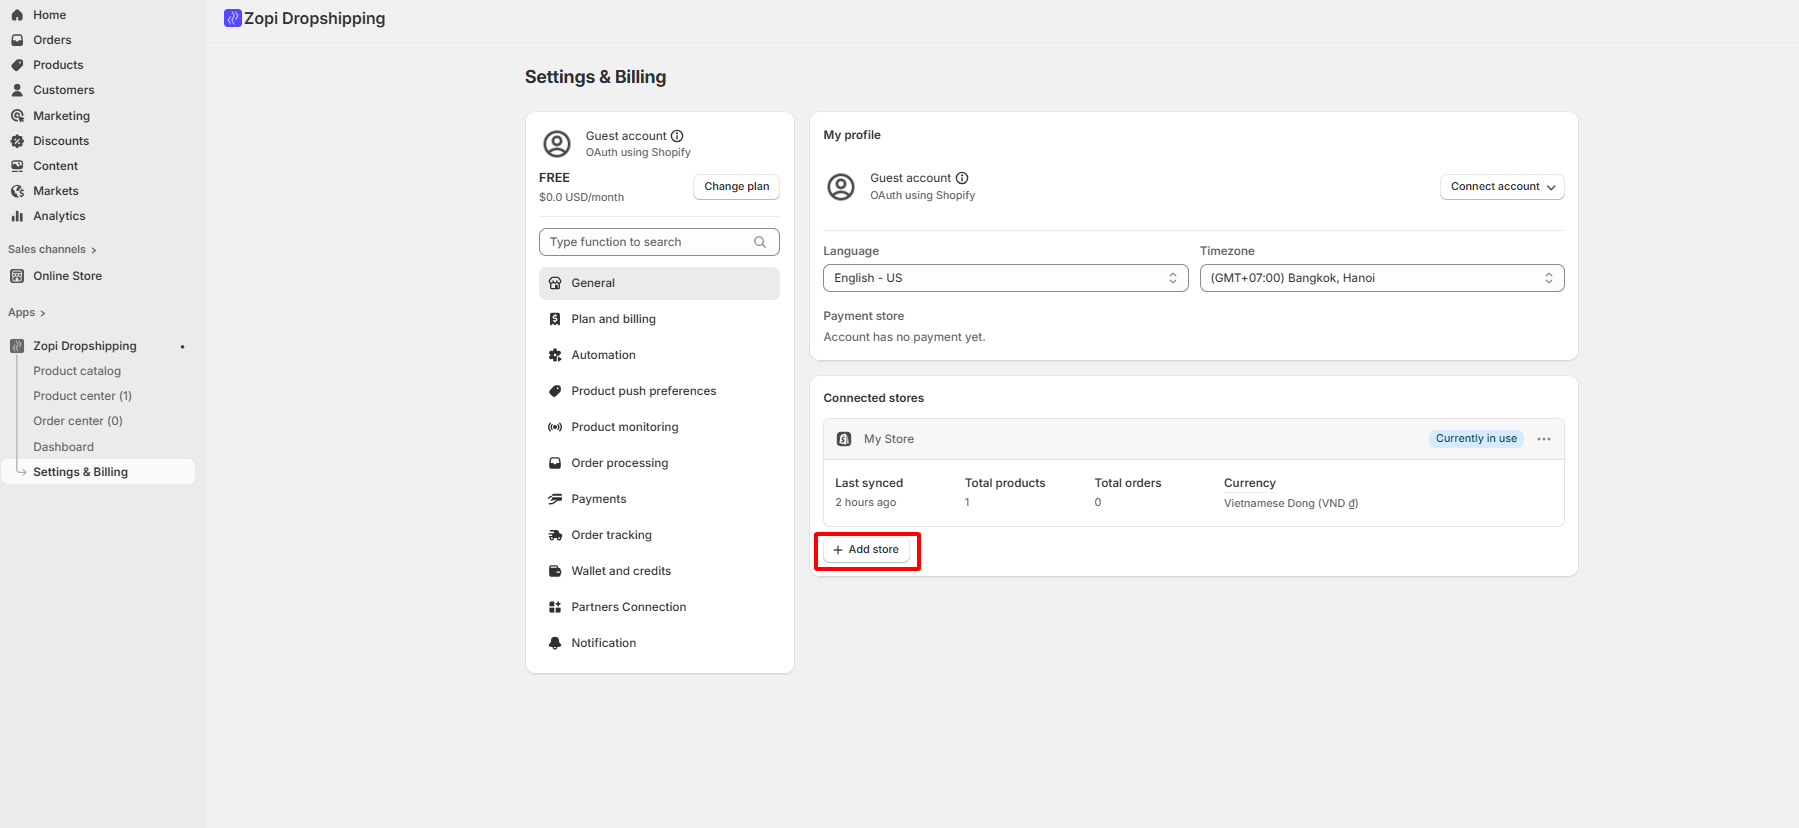
  • Select Add Store.

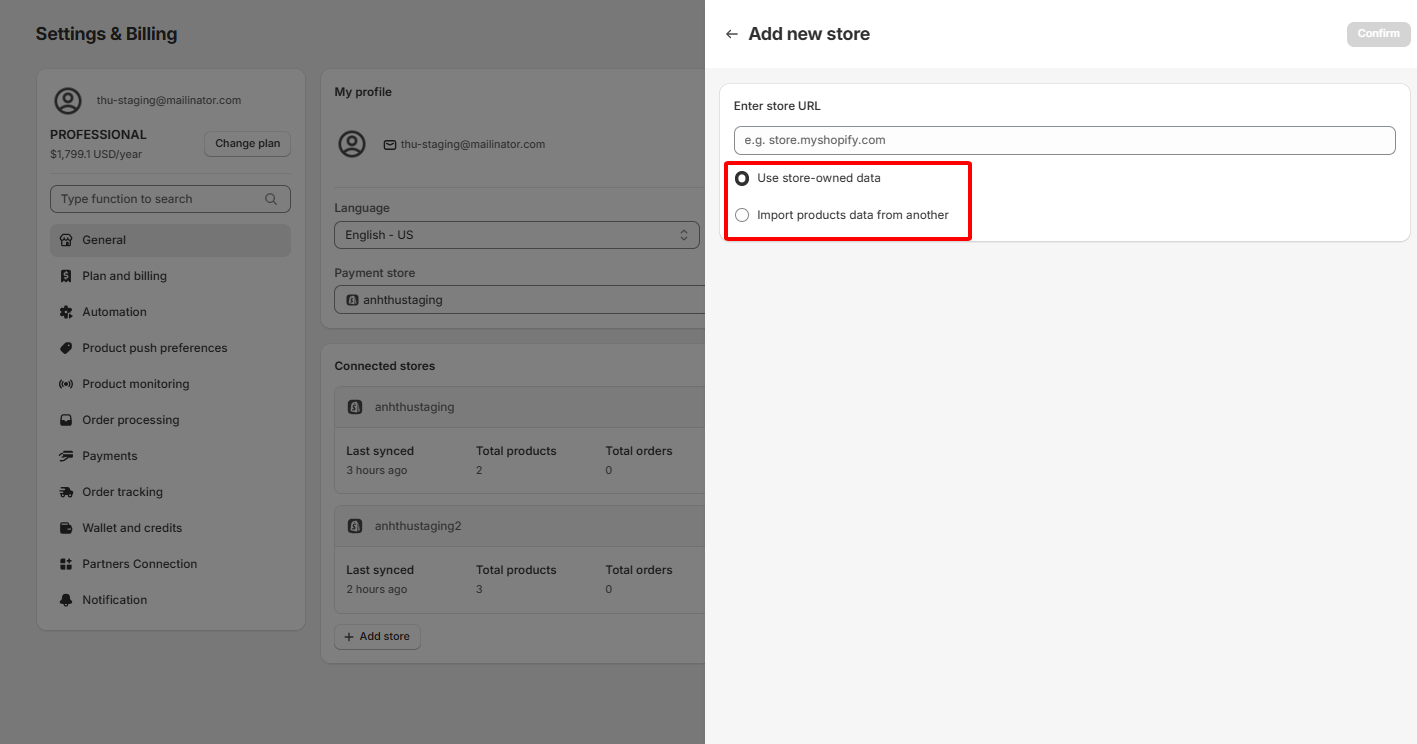
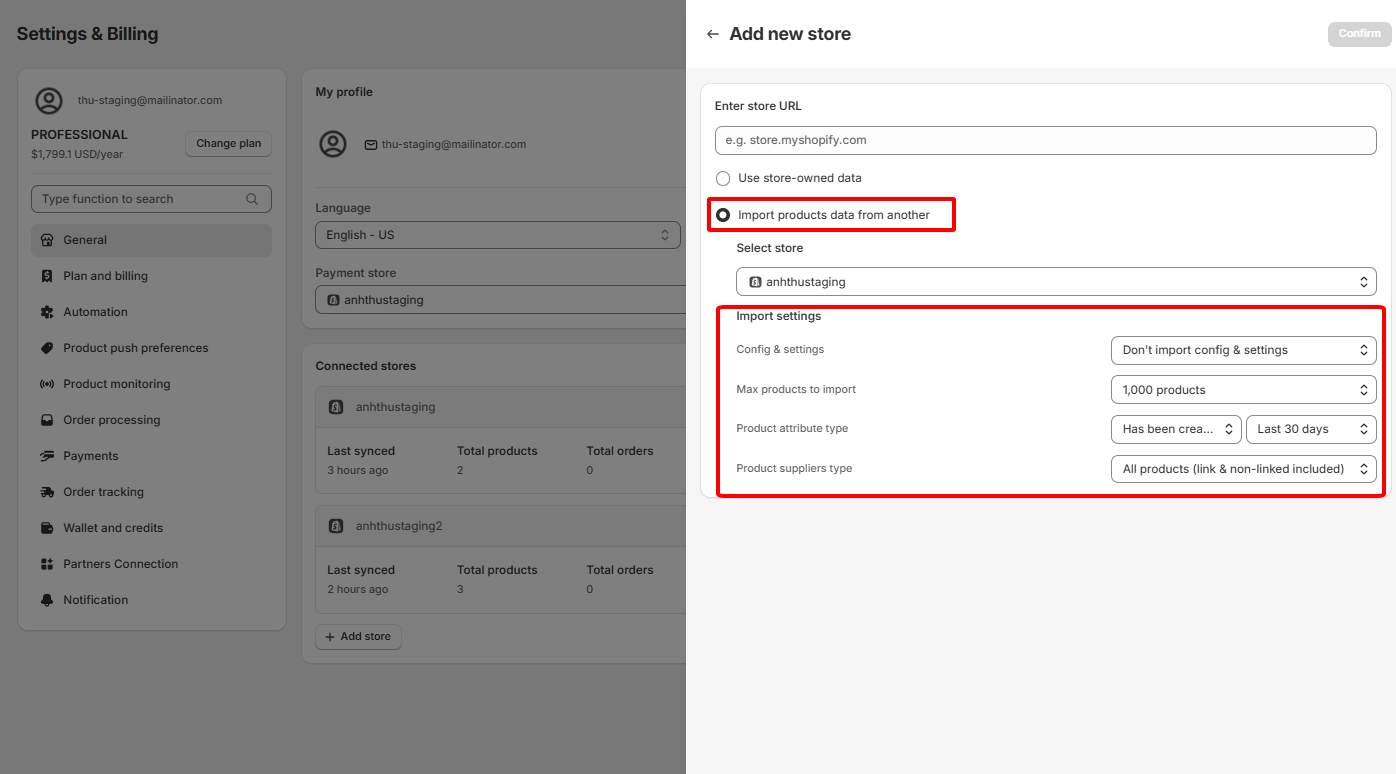
Step 3: Choose a Data Import Option:

  • Use Store-Owned Data: Use the product list already available in that store.
  • Import Products Data from Another Store: Copy products from an existing Zopi-connected store to the new store.

Step 4: Configure Import Settings (If Using “Import Products Data from Another Store”)

  • Config & Settings:

– Don’t import config & settings: Only products are imported; the new store keeps its own configurations.

– Import config & settings from selected store: Copies product configurations, pricing rules, and other settings along with the products.

  • Max Products to Import:

– Set the number of products to import, ranging from 10 to 1,000, allowing incremental imports for large stores.

  • Product Attribute Type & Time Frame:

– Filter products based on attributes: created, ordered, updated, store status, or from collection(s).

– Combine with a time frame: last 7, 14, 30, or 60 days to import only relevant or recent products.

  •  Product Suppliers Type:

– All products: Includes both linked and non-linked products.

– Only products linked with suppliers: Import only products already connected to suppliers.

– Only products with no linked suppliers: Useful if you want to assign suppliers for the new store.

Step 5: Click “Confirm” to finish the process.

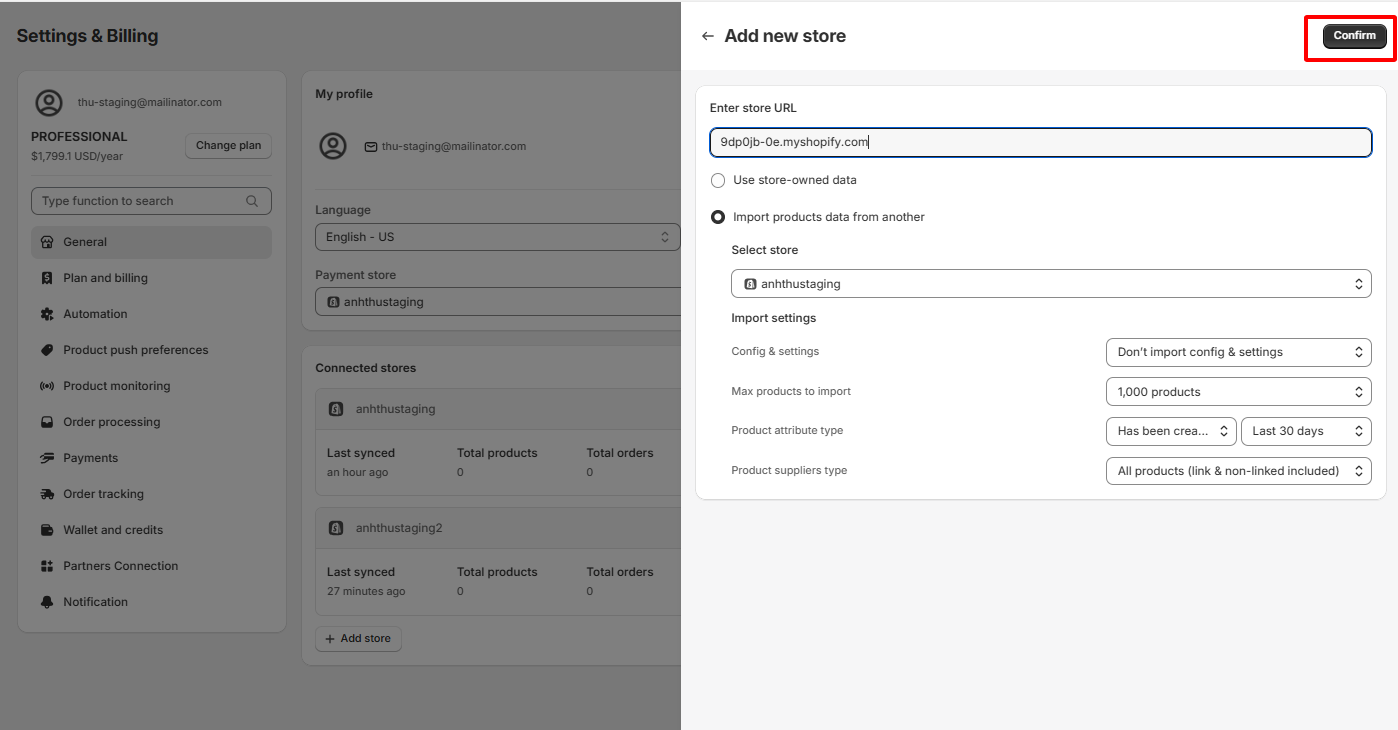
Start adding your Shopify stores to Zopi today and simplify multi-store management with ease and flexibility!—if you need any assistance, feel free to contact our Support Team.

Related articles

The New Product Analysis feature

Are you eager to analyze a product’s potential but feel overwhelmed by the multitude of research tools available? Our new Product Analysis feature streamlines this process for you. Read on to learn how it works! What is Zopi – Product Hunter? Product Hunter is a powerful tool designed to monitor and evaluate essential product metrics,…

Link Zopi with your AliExpress account

To efficiently place orders on AliExpress and synchronize product and order data, you need to link your Zopi account with your AliExpress account. Method 1: In the Account Menu Steps to Connect Your AliExpress Account via the Account Menu Log in to Zopi. Navigate to the Settings & Billing page and select Account. Locate the…

Change Zopi language

The Zopi app now supports multiple languages, including English, Arabic, French, Portuguese (Brazil), German, Italian, Dutch, Spanish, and Chinese. You can easily switch between these languages as needed. How to Change Language in the Zopi Web App Step-by-Step Instructions to Change Language: Log in to Zopi. On the right side of the Top Bar, select…

Subscribe
Notify of
guest

0 Comments
Inline Feedbacks
View all comments

Table of contents

Step-by-Step Guide to Add Another Shopify Store in Zopi

Related articles

Install the new Zopi Extension 2025

Zopi Extension 2025 is your comprehensive solution for product research, store insights, and effortless product imports. With AI-driven analysis and historical trend data, Zopi empowers you to identify successful AliExpress and Temu products while offering valuable insights into publicly accessible Shopify store data—without compromising private user information. By installing the Zopi Extension, you can unlock…

Get started with Zopi

Zopi offers an automated dropshipping solution equipped with both standard and advanced features. To effectively optimize and enhance your dropshipping business, follow the steps outlined below to get started. How to Create Your Zopi Account 1. Install the Zopi App You can install Zopi directly from your Shopify store. Once the installation is complete, a…

Log In to Zopi

To get started with Zopi for your dropshipping business, the first step is to log in. You can log in using one of the following methods: Log in to the Embedded App Log in to the Web App Method 1: In the Embedded App Zopi is optimized for Shopify. When you create a Zopi account…

Share your thought